Click on Planning and then select Shiftplanning/ Base schedule advanced from the left menu.
When you open it, the menu on the left will disappear and most of the screen will show Shiftplanning/ Base schedule advanced tool You can access Planning menu at any time by hovering your mouse over the grey menu the arrow is pointing at in the image below.
Shiftplanning/ Base schedule advanced uses a direct saving method, i.e. all things you do are saved in real time so you never have to press a save button.
New task rotation period
To start working with a new task rotation period, first select a name; e.g. Summer as well as which cost centres you want to plan task rotation for.

After selecting a name and adding cost centres, press Create.
You will only be able to select cost centres that you have permission to access, so if a cost centre is missing, please contact your company's SuperUser for access.
Once you have created a timetable period, you will see a new view showing the name of the period, date and a number of buttons through which you can navigate back and forth in the calendar. Schemaplaneraren (Timetable Planner) has a longer deadline since it can generate dates up to 1.5 years ahead, which gives you, in your capacity as scheduler, a better overview. You can also scroll back in time to see past dates.
The small house button takes you back to today's date.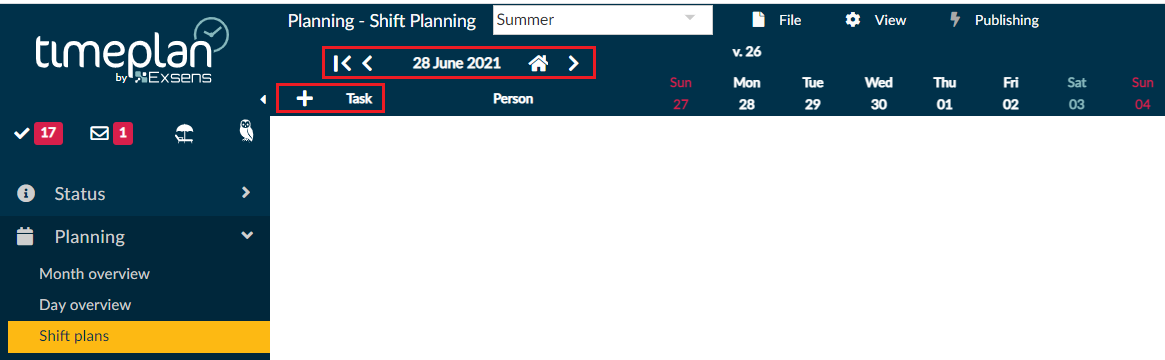
To start posting basic schedules, press +Task. There you get to choose whether you want to set up a completely new task rotation or add an existing one. If you choose to use an existing task rotation, Timeplan will retrieve your previous task rotation and you can choose to further develop them shiftplanning/ Base schedule advanced
Creating a task rotation
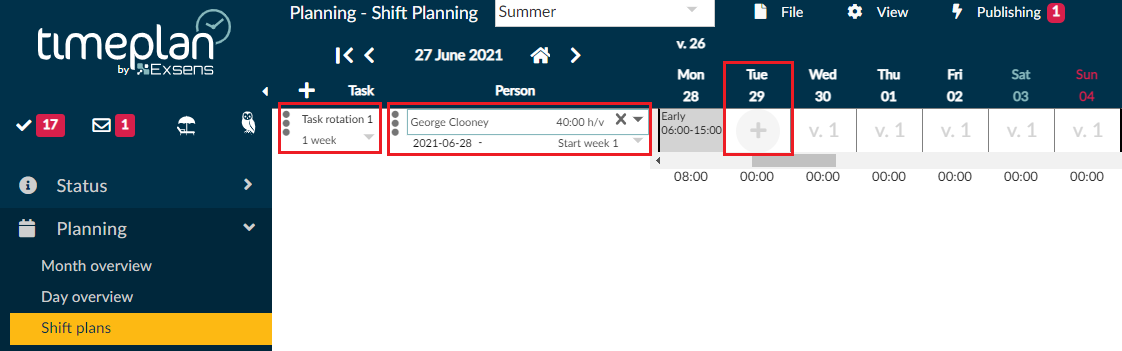
You can add a description/name to your timetable. Below it you can select the duration of the task rotation, i.e. how many weeks it rolls over (1-16 weeks). You can choose to add a person to the task rotation immediately or you can create an unmanned task rotation. You can select the start week and date of the schedule. 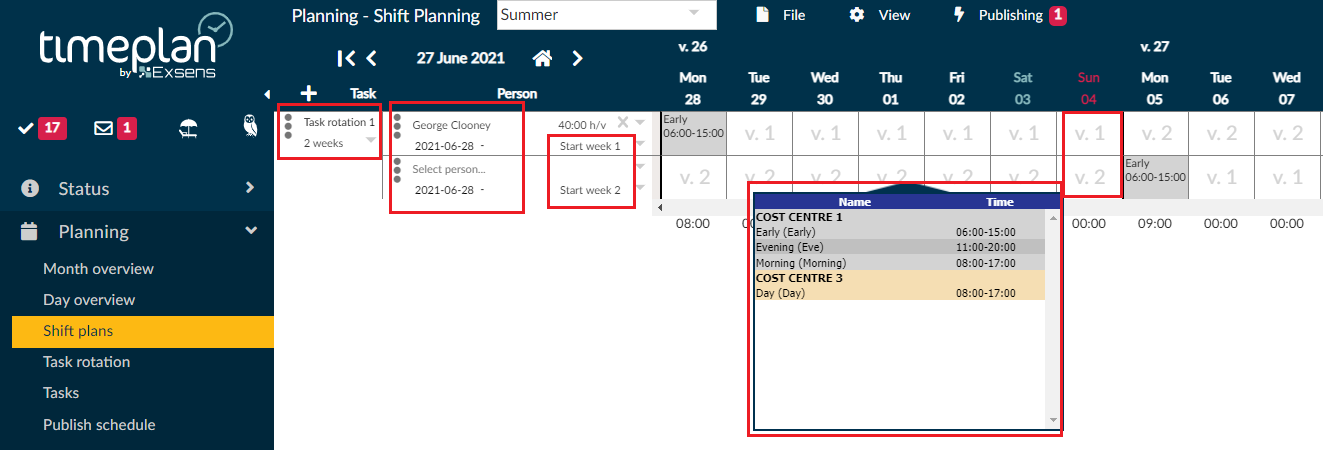
In the image above you can see that a rolling timetable of two weeks called Summer is being created.
If you click on the three dots, you can choose to link another person to the schedule, either a specific employee or an unmanned schedule. This option is useful if you have two employees who are going to work according to one and the same timetable, but who are also going to overlap, because the changes made in one task rotation automatically affect the other.
Two people are linked, who in this example are called Noname and George Clooney. They both start working according to the schedule on 06/28/2021 but have different start weeks, because they are going to overlap. This becomes particularly clear when the weeks have different numbers (see example Monday the 28th).
To start posting a shift, hover your mouse over a day of the week and click. You will then see a drop-down menu with all work shifts available at the added cost centres and the people.
Shiftplanning/ Base schedule advanced works using the so called "Drag and Drop” method, which allows you to easily place and move shifts between days and timetables. Everything you do is saved in real time so be careful not to make too big changes because the system saves everything, even the errors, if any. In this early version there is no undo button.
If you want Timeplan to check Working time regulation check while you are creating your timetable, click on View and then put a checkmark in Enable working time regulation checks.

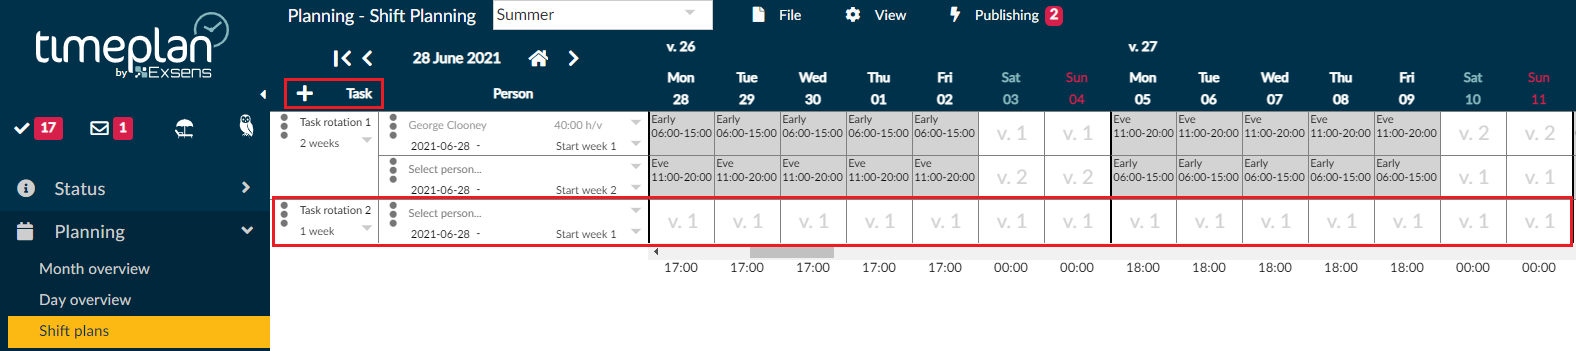
Multiple task rotation in one and the same view
Once you are satisfied with one or more of your timetables, you can easily continue your planning by pressing +Task to add more task rotations. These are posted automatically under the others and you can name the schedule, enter weeks and link to employees etc.
Publishing
Once the task rotation is complete, click Publishing. A list will be displayed containing warnings or errors that must be rectified before the timetable is completely clear. 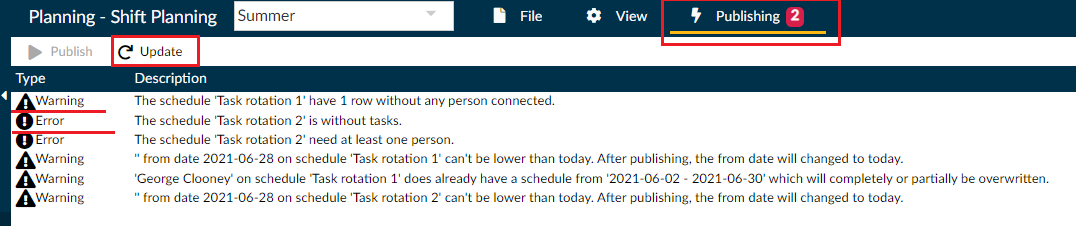
- What is referred to as "error” must be rectified before the task rotation can be published.
- What is referred to as ”warning” is given as an indication that something may need to be rectified. However, the task rotations can be published even if you choose not to rectify the warnings.
Once the list has been reviewed, click Update. If all items have been rectified, the list will be empty and the task rotation - ready to be published.