Before your weekly breakdown opens, you have to choose which date to use as start date, how many weeks to display, and which cost centres to see.
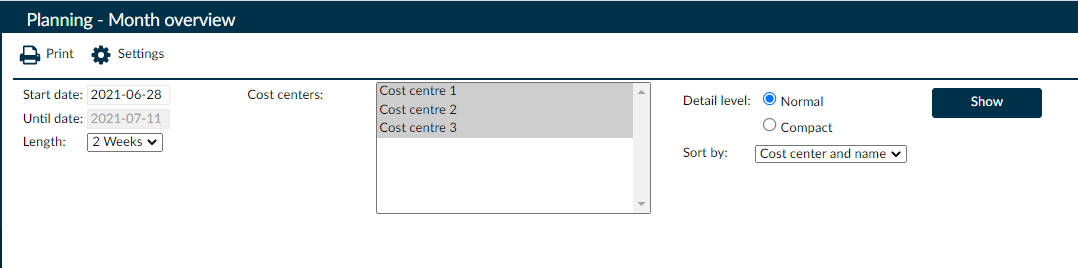
Under Settings you can make more detailed adjustments and customise the weekly/monthly overview so that it shows the items you are interested in seeing.
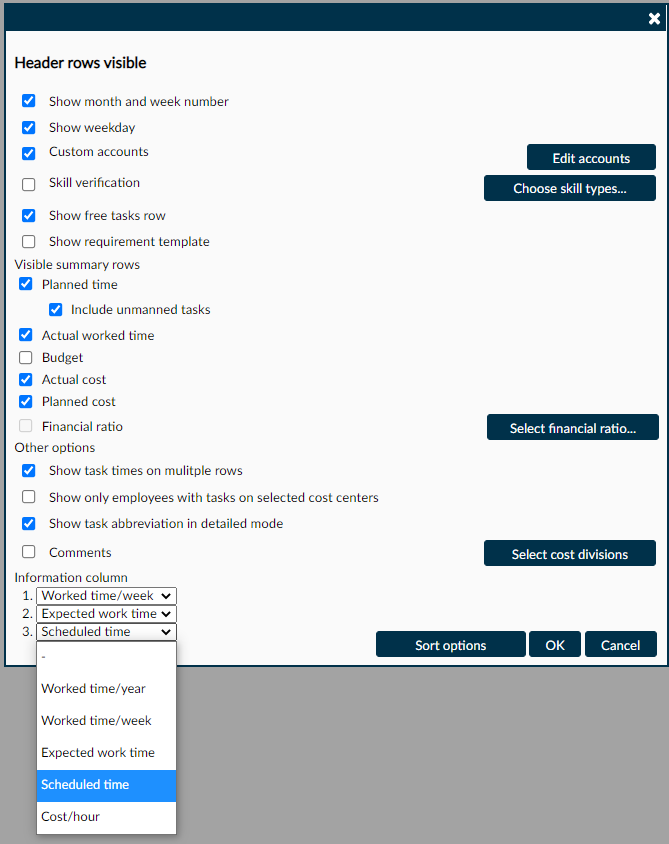
You can choose to display days, dates, week numbers etc.
A good feature to gain control over hours and time worked is to select three accounts to display on the left side of the weekly/monthly overview . This is done under Information column at the bottom of the page.
If you have extra or absent personnel or if you have a preference for the order in which you want to see your personnel, you can click on Custom Sorting. This opens a view where you can drag the names of the personnel to a specific order, which is then reflected in the weekly/monthly overview . Once satisfied, click on OK and then on OK again to return to the view above. Here it is important to select Sorting and then Custom Sorting in order for it to have an impact on the weekly/monthly overview . Once you are satisfied with your settings, click on View.
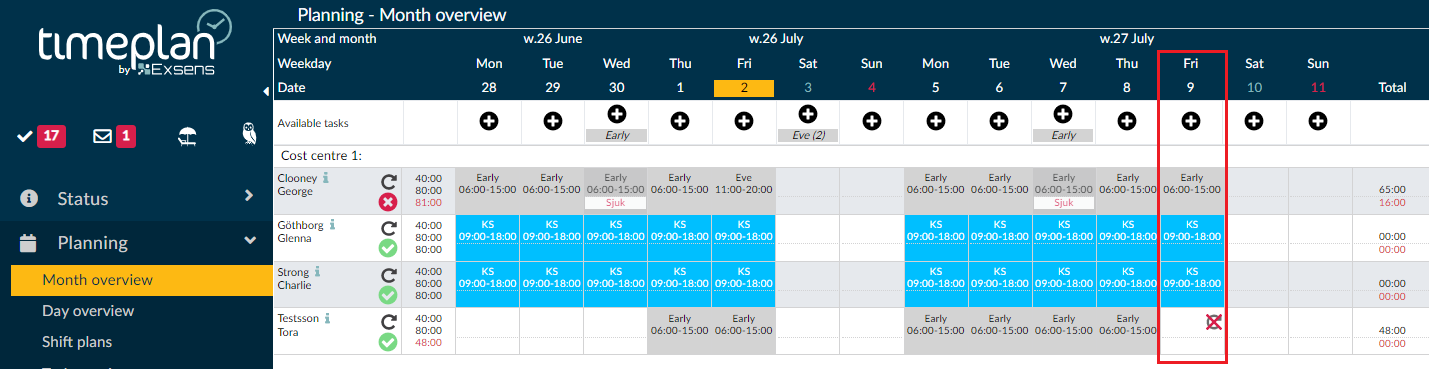
Weekly/Monthly overview shows a lot of information:
- The employee’s first name and surname. The row that goes horizontally from the name is the information related to the employee.
- The shift that the employee is to work Mhursday, 1st of July, week 26. The top row of the box is the shift abbreviation defined when it was created. For more information on creating work shifts, see here! The bottom row shows the hours of the shift.
- The symbol to the right of the number indicates that there is a basic timetable linked to the person and that it rolls during the period. For more information on creating a basic timetable, see here!
- The green symbol next to the digit shows that all working hours and daily rest periods are met in the timetable. Timeplan will never prevent you from departing from the law but we recommend following the law to the greatest extent possible.
- The options under information column that you can make under Settings can be seen here. The account to which the numbers refer can be seen if you hover the mouse pointer over the numbers.
- Here you can see the total working time during the selected period, in this case one week. If you opened a month, the sum would be one month's working time.
- The red numbers on the right, during the total working time, are the absence hours, including full day absence, during the selected period. There may also be a blue number here and, of so, it would indicate the absence time during part of the day that may be entered in the timetable during the period.
- Here you can see that the employee is absent with the code sick.
If you want to review a day or a shift in detail, double-click on the shift or the day and you will be directed to Time rec. and balances where more specific adjustments can be made. These adjustments will be reflected immediately in the weekly/monthly overview .
Moving shifts in the weekly/monthly overview
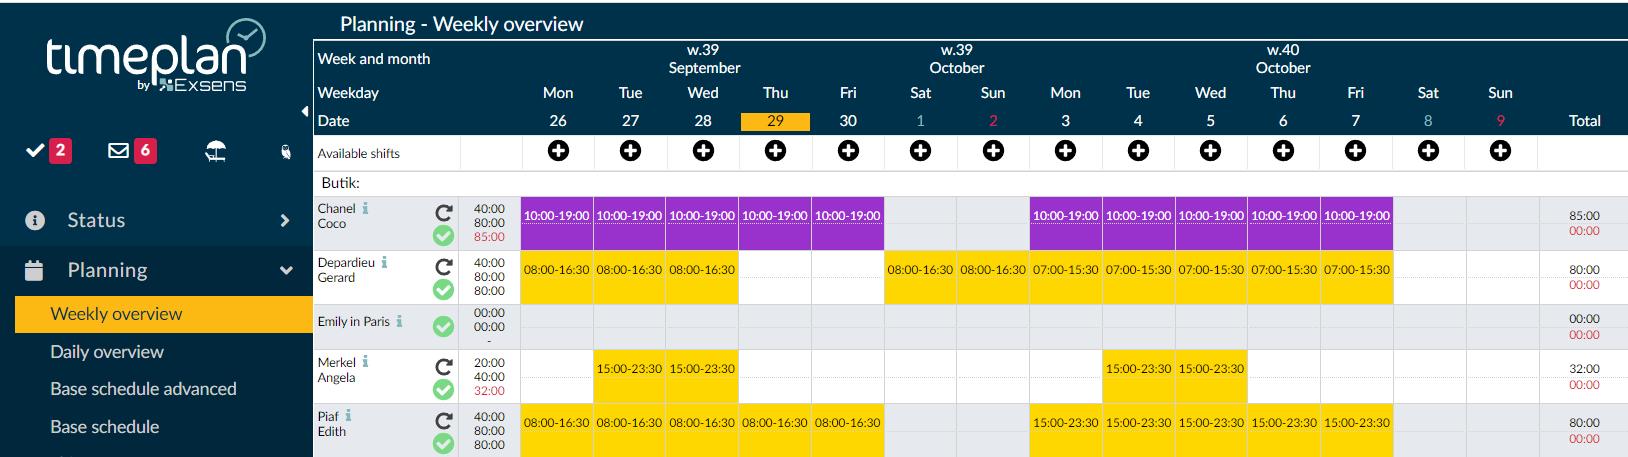
Weekly/monthly overview makes it easy to move shifts between employees. If an employee wants to switch a shift or if, for some other reason, you need to move a shift from one employee to another, select the shift to be moved. All employees who can work the shift light up and you can click on the employee who will be working instead, so the employee moves to that line and the shift is switched.
 This symbol appears on the employee whose shift was moved because Task rotation has now been circumvented and that person is now behind with their weekly working hours.
Adding shifts to Weekly/monthly overview
If you want to add extra shifts, you can easily do so directly in the weekly/monthly overview .
First you have to decide who will work the shift. Then click once on the day on the line of the employee who is to work and you will get a box with all available shifts for that person. The shifts displayed are determined by the cost centres to which an employee belongs and their level of competence. After that, click on the shift you want to post and then press OK.
The shift will come up on the selected day.
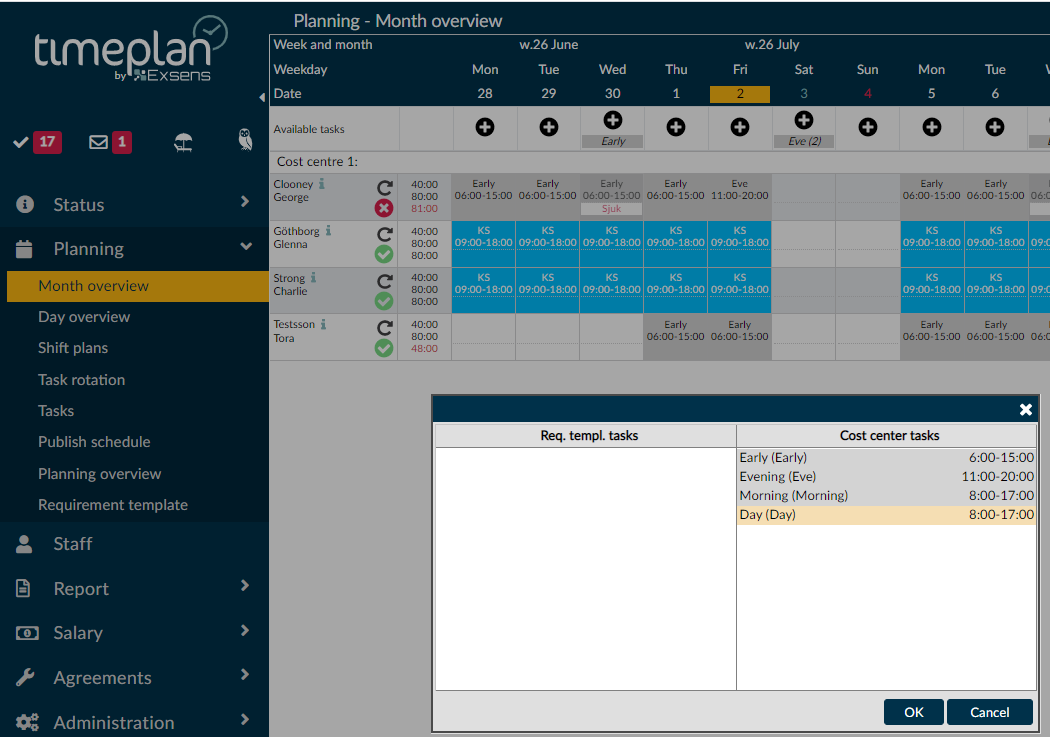
Adding unmanned work shifts in to Weekly/monthly overview
Unmanned shifts can be added to the weekly/monthly overview. During particularly staff-intensive periods you might have to bring in extra staff but you do not know who can work, only that there are shifts that needs to filled in.
Click on the [+] symbol as specified above on the day you want to add unmanned shifts. This opens a box where you can choose the type and number of shifts you want to add. Once you are satisfied with the number and type of shifts, press OK.

The shifts will then fall down and end up on the line Unmanned Shifts. You can see the type of shift in the description and the number of shifts of the same type by the number in brackets. In the example above there are two day shifts, one evening shift, one more day shift but from another cost centre and then a morning shift. When you want to post your shifts to employees, click on the shift you want to post. Anyone who can work that shift lights up and you click on the person you want to give the shift to.
Shifts requests can also be sent out to your personnel via the Timeplan web app for employees. For instructions on how to do this, please refer to the manual at Webbapp, Användarmanual för Administratörer (Web App, User Manual for Administrators) as well as Webbapp, Användarmanual för Användare (Web App, User Manual for Users).
If you need to delete an unmanned shift, press it and select Delete in the menu that appears.
Deleting shifts from weekly/monthly overview
If there has been an error when posting shifts in the weekly/monthly overview , you can delete them by pressing the shift that is incorrect. It is then highlighted in a lighter colour and you can press DELETE on your keyboard to delete the shift. If it is Task rotation shift you are deleting, the symbol will appear and you may have to compensate the employee with a different shift to accommodate their employment rate.
To remove the unmanned shift from the weekly/monthly overview , click on the desired shift and select Delete.
Adding an absence code in weekly/monthly overview
If an employee needs to be absent from one or more shifts, you can add this directly to weekly/monthly overview .
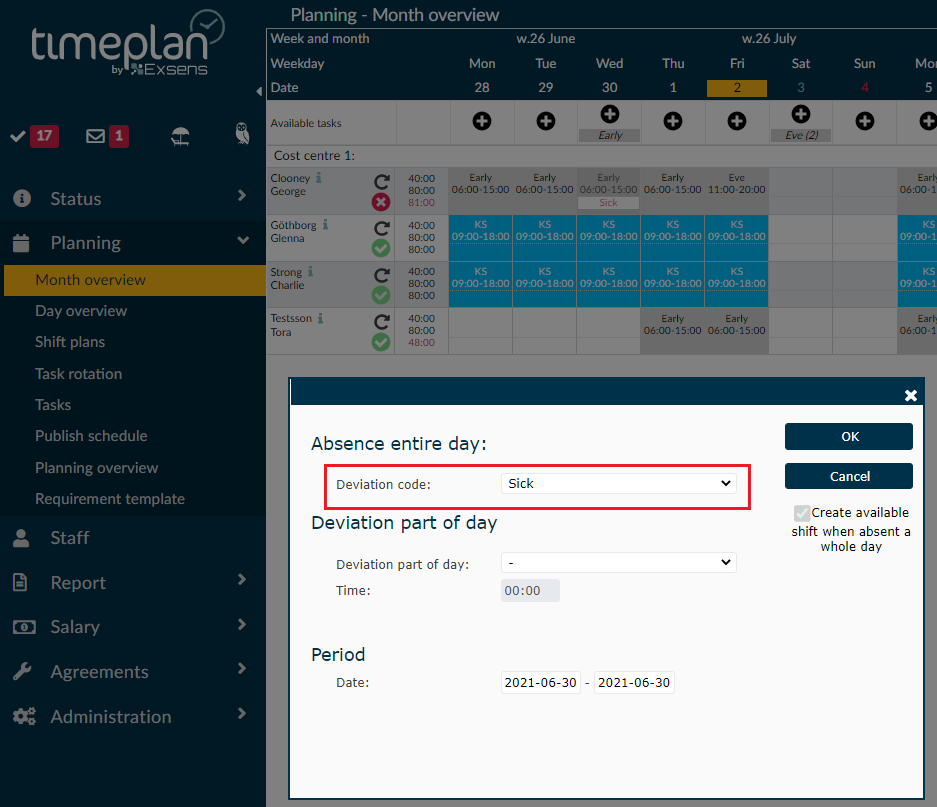
Double-click in the bottom box (marked in red in the image above) for one day to quickly bring up the absence manager.
You can then select the type of absence from the drop-down menu and enter the period in question. It is set to only apply to one day, but if an employee will be away on holiday, you can easily add this here. Then press OK and the absence code will be rolled out under the selected dates.
It is important not to delete the work shifts for the employee during the absence period because the timetable must have a shift to be absent from in order to perform the calculation correctly. If an employee is to be absent on days when they do not have a work shift, the absence code will remain. The timetable does not deduct holidays or hours from days on which the employee does not need time off from a shift.